
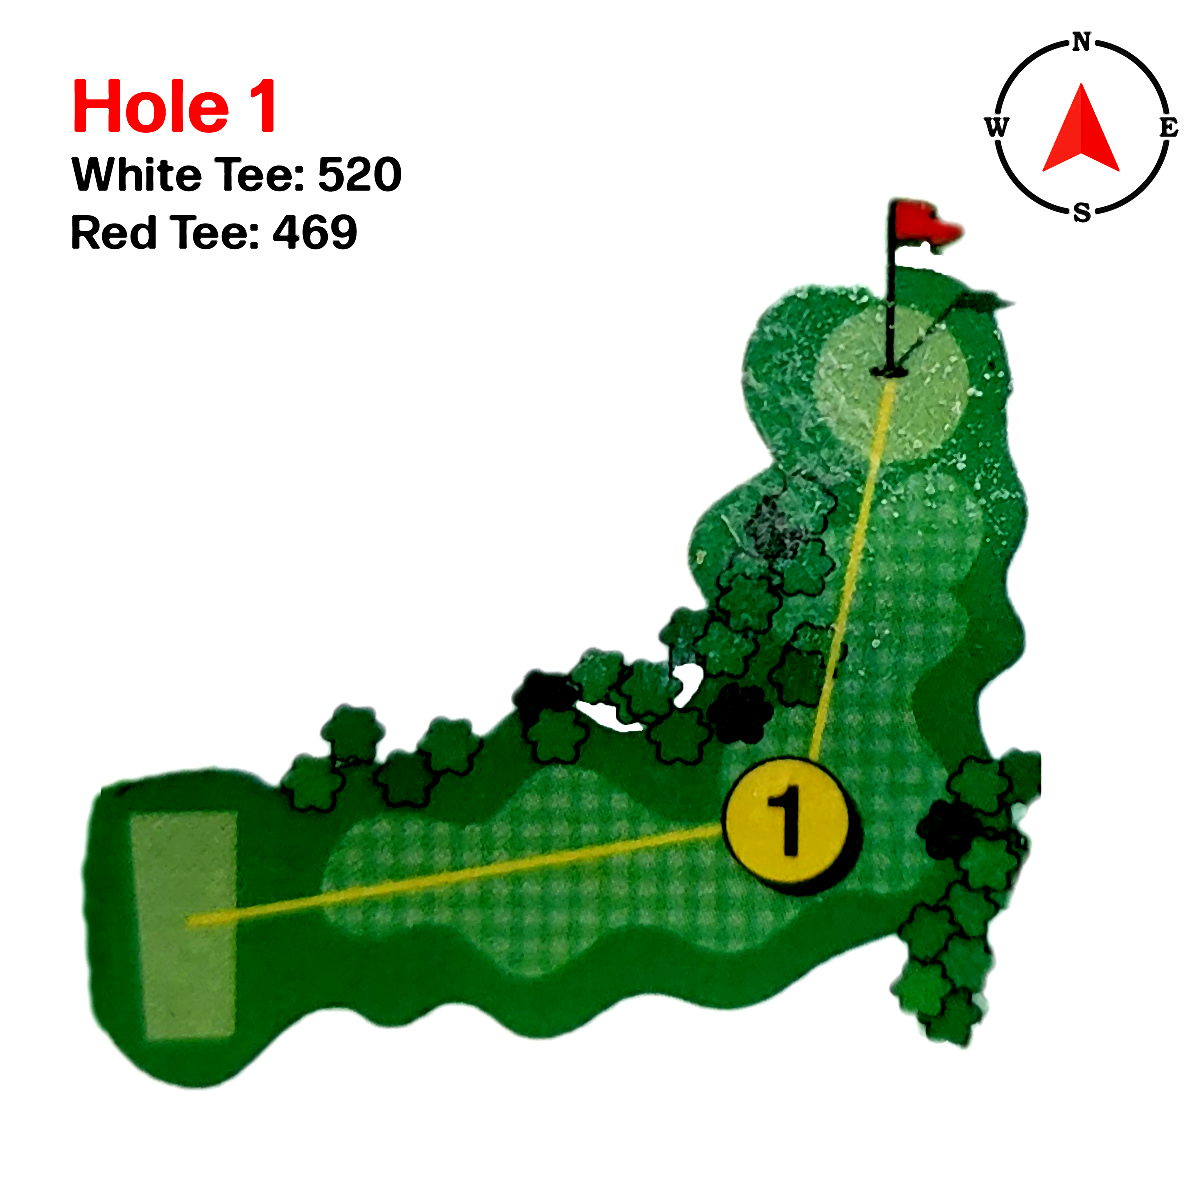
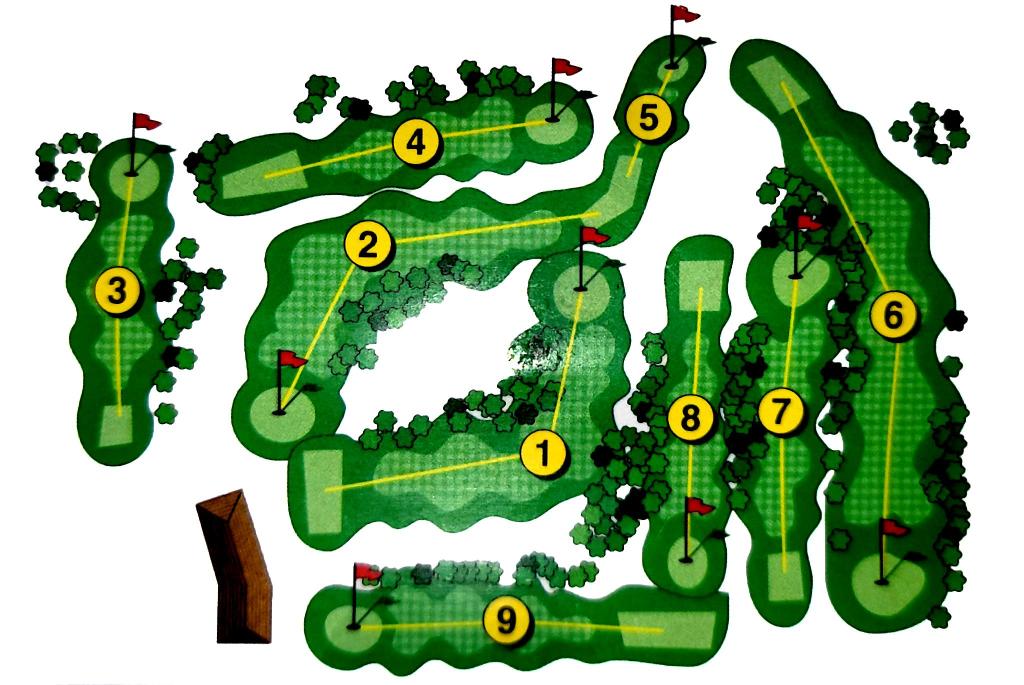
Hole #1
Hole 1 welcomes golfers with a wide fairway and scoring potential, but danger lurks along the left with out-of-bounds running the entire side. At 520 yards from the white tees and 469 from the reds, this dogleg-left par 5 invites both power and precision. A well-placed drive down the center gives longer hitters the green light to go for the green in two, chasing an early eagle or tap-in birdie. For those opting for a layup, position your second shot carefully to set up a simple wedge into a generous green. It’s a thrilling opener that rewards confident swings but punishes stray shots.
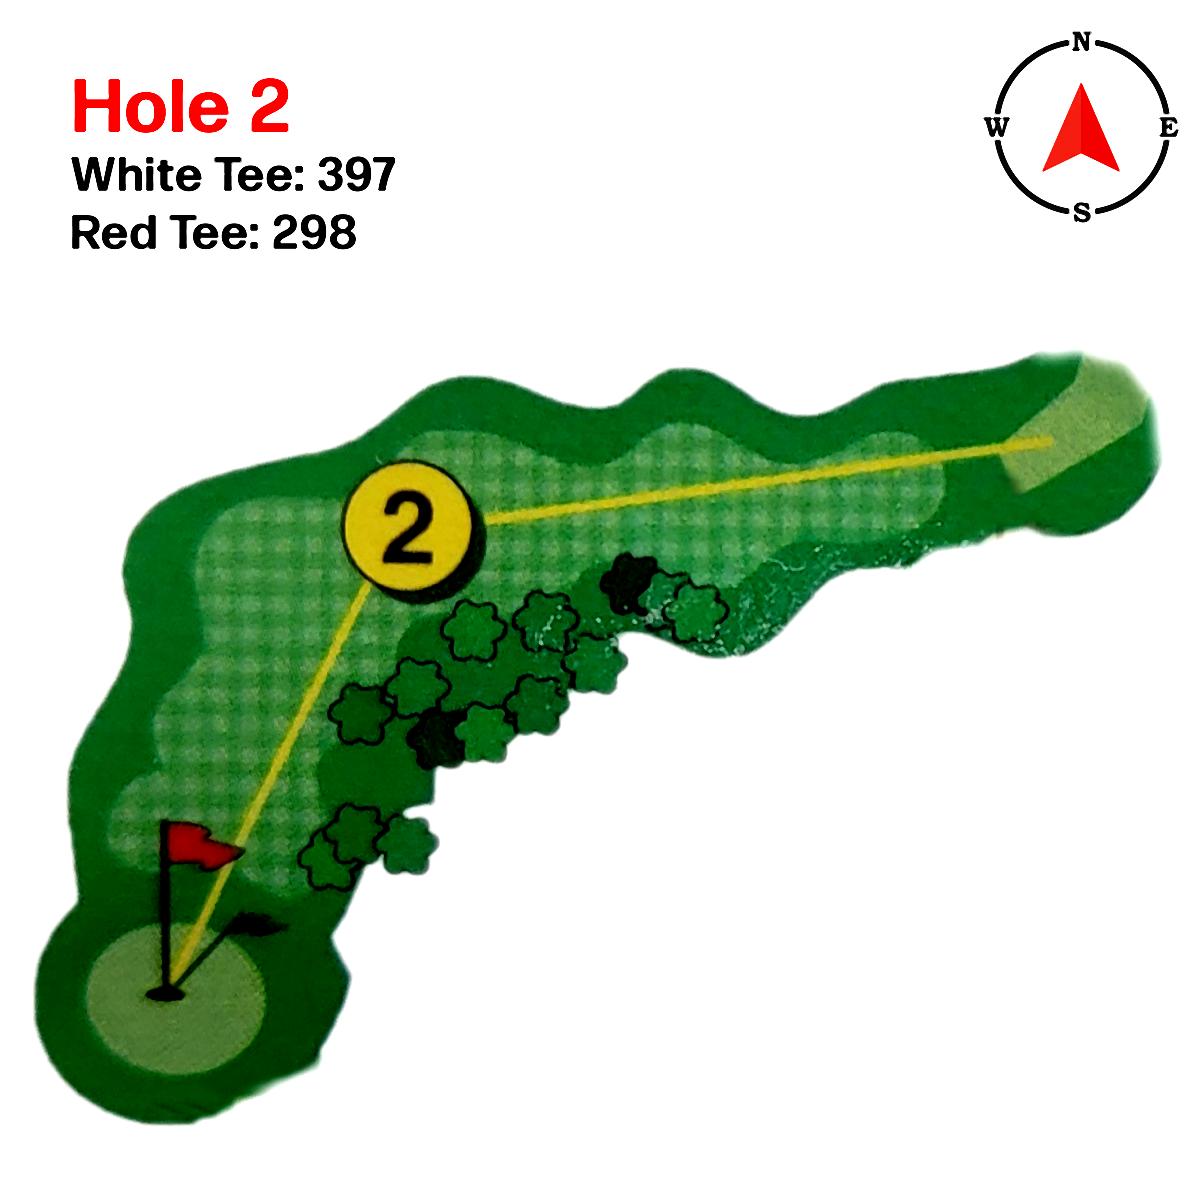
Hole #2
Hole 2 presents an early test of course management with its sweeping dogleg left and out-of-bounds running down the left side. From the tee, accuracy is key — aim toward the right-center to avoid being blocked by the tree line or drifting into OB. At 397 yards from the white tees, this hole is reachable in two with a smart drive, but the green sits tucked behind protective trees, demanding a precise approach shot. Cutting the corner is tempting for long hitters but risky. Play it safe and set up a short wedge for a strong birdie opportunity to build confidence early in your round.

Hole #3
Hole 3 is a strong par 3 that will test both distance and accuracy early in the round. At 226 yards from the white tee and 211 from the red, out-of-bounds along the left side and a tree line to the right make this a true test of precision. The green is fair but well-protected, and controlling your landing spot is critical to avoid tough chips or bunkers. Hit the green in regulation and you’ll be rewarded with a good look at birdie; miss left or right, and it quickly turns into a grind for par.
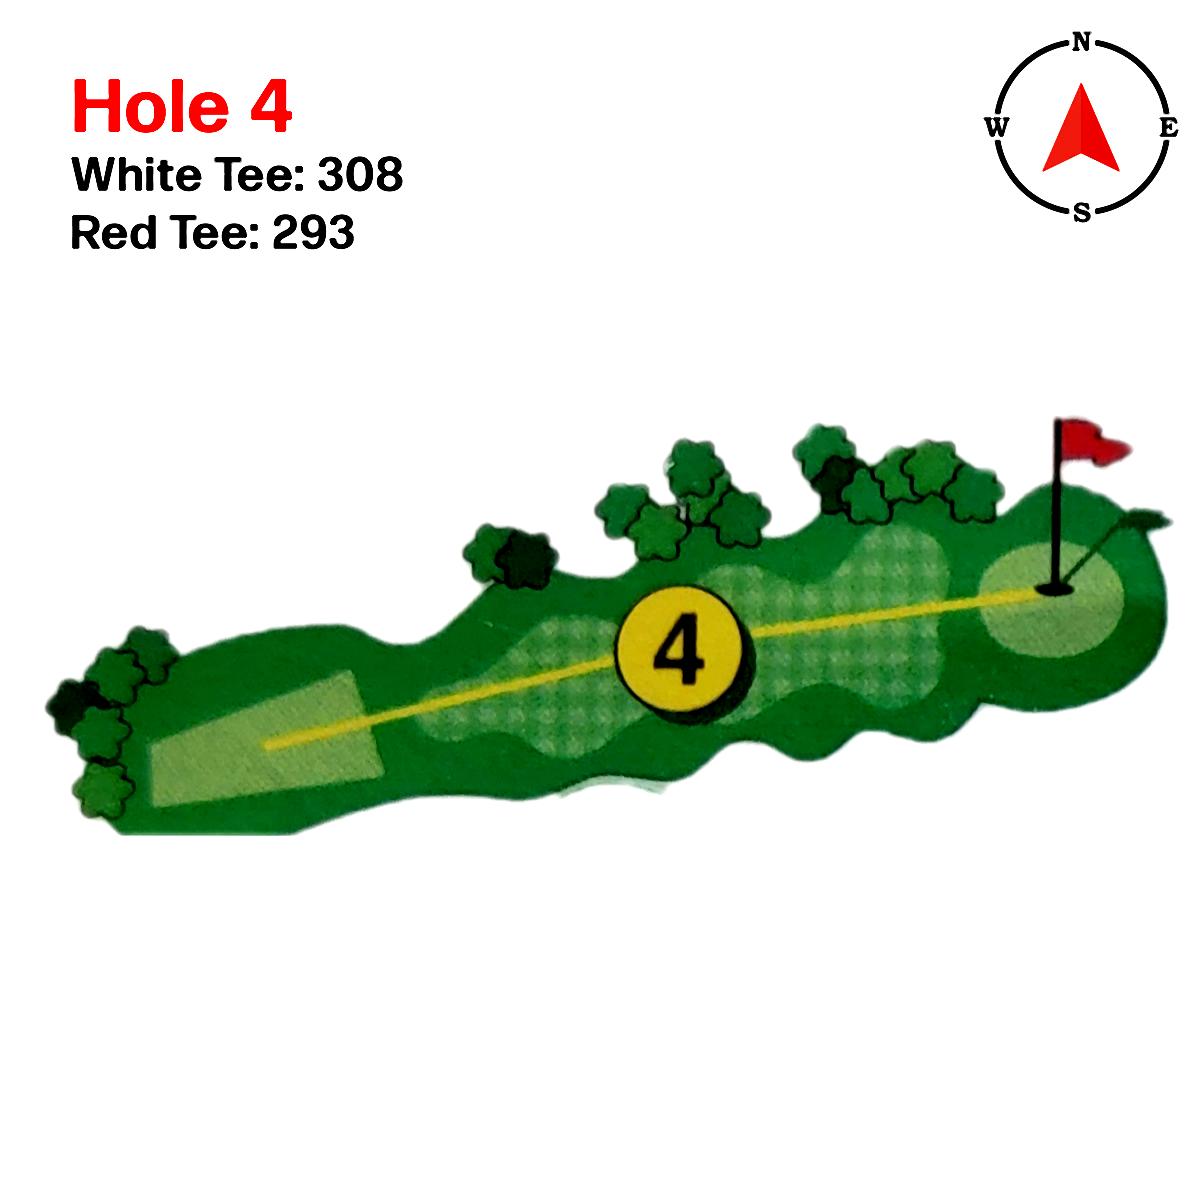
Hole #4
Hole 4 is a short par 4 that teases golfers with its scoring potential — but it comes with a warning. Out-of-bounds lurks just beyond the treeline on the left, making accuracy off the tee crucial. At only 308 yards from the white tee and 293 from the reds, aggressive players may consider going for the green, but the smarter play is a controlled drive aimed right of center. From there, you’ll have a short wedge approach into a green that’s accessible but protected by trees and subtle slopes. Play it smart, avoid trouble, and you’ll be staring down a very makeable birdie putt.

Hole #5
Hole 5 is a picturesque short par 3 offering a breather with no out-of-bounds in play. At 160 yards from the white tee and 145 from the red, this hole tests your ability to pick the right club and make a confident swing. The green is generous but well-protected with subtle slopes that can leave tough putts if you’re not precise. Focus on landing your shot in the right tier or spot, and you’ll be rewarded with a great birdie look. A simple but satisfying scoring opportunity.
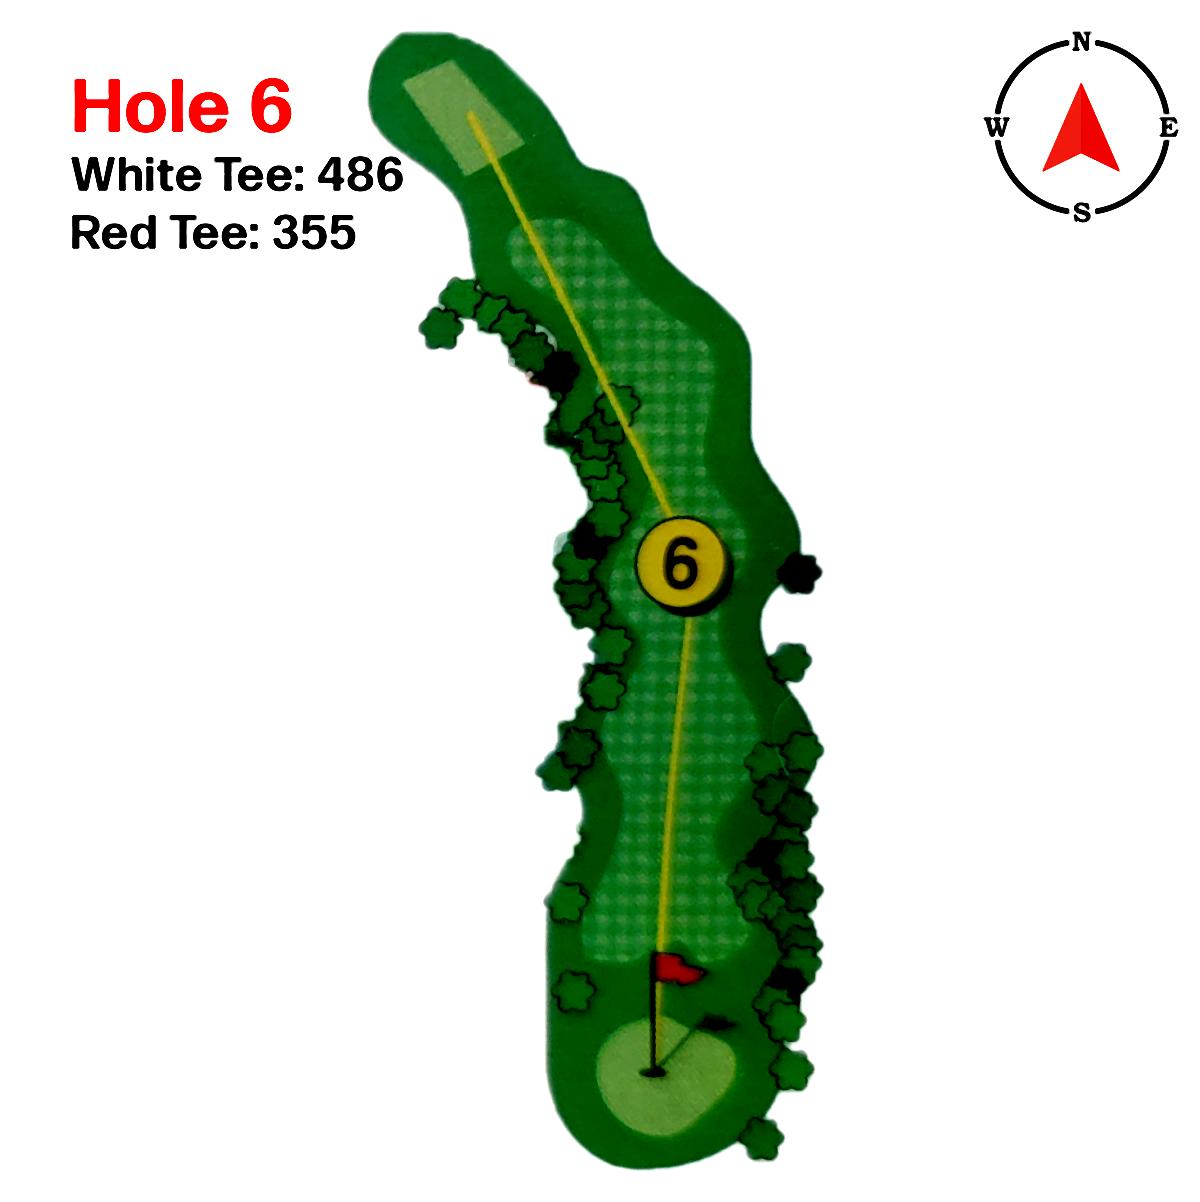
Hole #6
Hole 6 is a true three-shot par 5 that rewards patience and positioning but tempts the big hitters. At 486 yards from the white tees and 355 from the reds, two perfectly executed, long shots can give a rare chance at eagle. With out-of-bounds running the entire left side along the cornfield, the tee shot demands control and accuracy. Most will choose to lay up and play for a manageable third shot into a green that’s approachable but well protected. Whether you play it safe or go bold, this hole offers excitement and challenge.
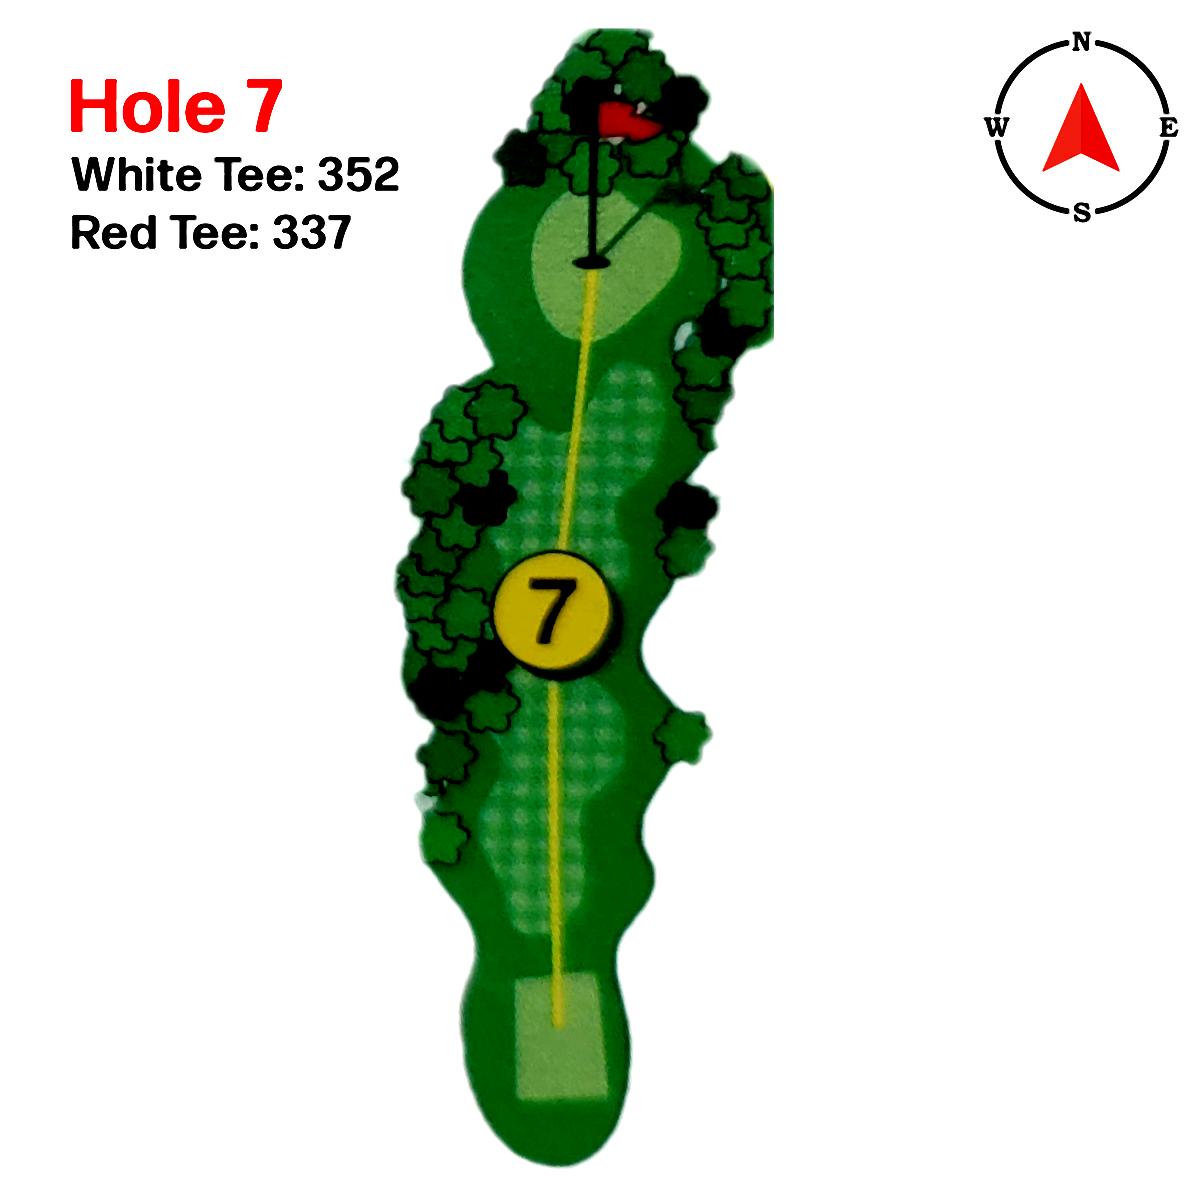
Hole #7
Hole 7 is a player-friendly par 4 that offers wide landing areas and minimal tree trouble. At 352 yards from the white tees and 337 from the reds, this hole allows golfers to swing confidently off the tee. While slight mis-hits may find light rough or sparse trees, most players will have a clear second shot. The green is large and receptive, offering a strong birdie opportunity for those who stay in play.

Hole #8
Hole 8 is a comfortable, inviting short par 4. At 326 yards from the white tees and 301 from the reds, the fairway is more forgiving than it appears, especially on the left. But don’t get careless — the right side holds dense trees that can make recovery tough. A smart drive sets up a short approach to an elevated green. For those who keep the ball on the correct side, birdie is right there for the taking.

Hole #9
Hole 9 closes out the round with an elevated tee shot on a beautiful par 4. At 350 yards from the white tees and 336 from the reds, the left side is out-of-bounds and calls for precision. Clear the hill with a solid drive, and you’ll see your ball roll down toward the green, leaving long players with less than 100 yards (marked by the red stake) for their approach. The green awaits with aggressive slopes and challenging breaks. Finish your nine holes strong with smart placement and a birdie chance.
Yardage/Par
| Tee | Yardage | Par |
| White | 3125 | 36 |
| Red | 2745 | 37 |